Supabase (NodeJS)
This guide will teach you how to combine Web3 authentication with Supabase authentication. The Web3 authentication flow will be managed using the Moralis Auth API.
Let's start by defining Supabase. In short, Supabase is an open-source substitute for Firebase - backend-as-a-service, that is. Furthermore, it's a quick approach to go from Postgres schema to REST API!
In this guide, we will take advantage of Supabase's row-level security (RLS) as we use a custom authentication provider!
Let's dive in.
Steps
- Set up Supabase with RLS
- Request a message from Moralis' Auth API
- Store a user in Supabase and sign a JWT with the user
- Make client-side requests using the JWT
Set Up Supabase with RLS
First, let's create a Supabase account here.
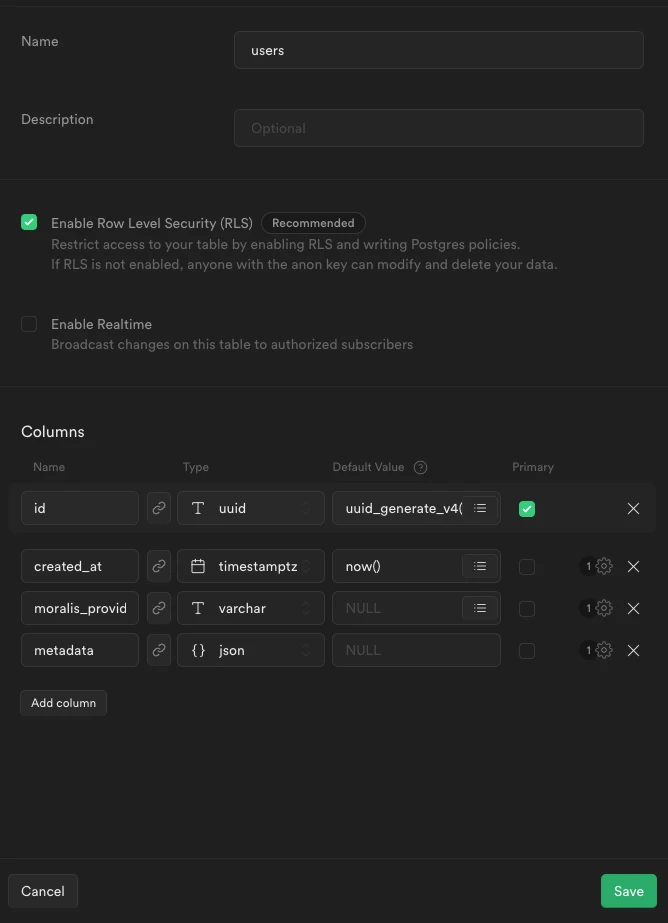
We will not use the Supabase default auth schema because we do not want to use email and password authentication but rather wallet authentication, so we will create a new users table in the public schema.
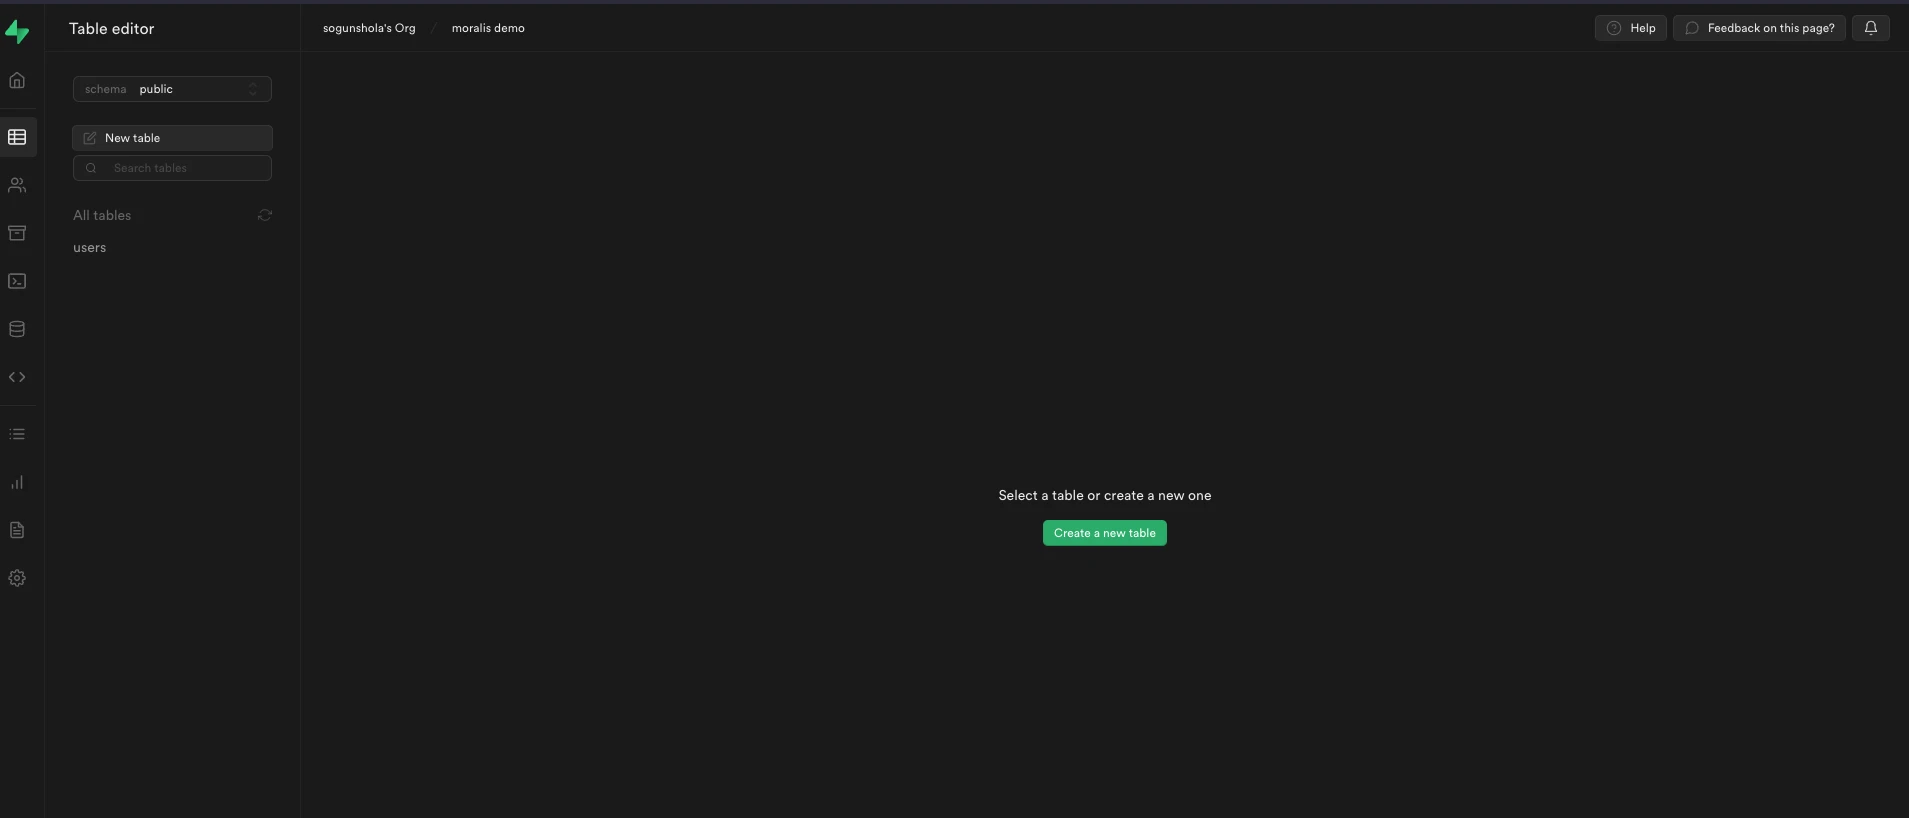
On the dashboard, go to Table editor, select public schema and click on Create a new table:


Remember, since Supabase uses PostgreSQL, your table must be structured with all the necessary fields. In this case, id, moralis provider id, and metadata.
The last thing we need to do is configure the RLS policy for our table. Learn more about Supabase RLS.
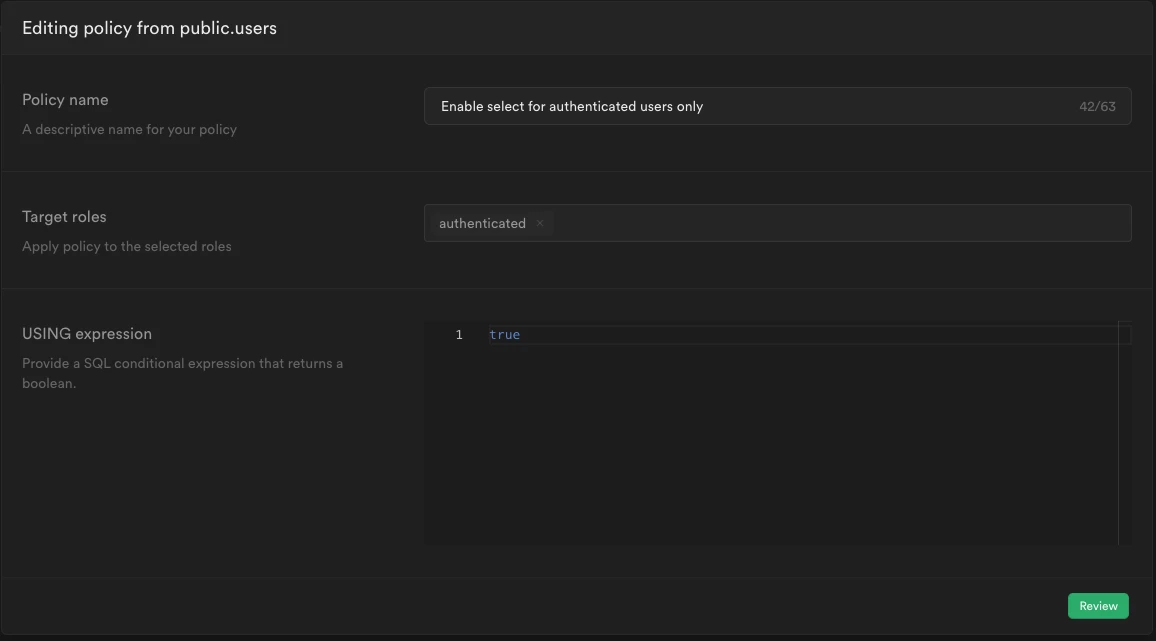
We will create a policy that allows only authenticated users to access the table.
To do this, go to Authentication > Policies, then click on Enable RLS for the table we just created > click on New policy for the created table:

CREATE POLICY "Enable select for authenticated users only"
ON public.users
FOR SELECT
TO authenticated
WITH CHECK (true);
Backend
We will now develop the authentication flow's backend logic. First, install the Moralis SDK and Supabase SDK:
yarn add moralis @supabase/supabase-js jsonwebtoken
We need to initialize the Supabase SDK with the Supabase credentials:
import { createClient } from '@supabase/supabase-js';

const supabase = createClient(config.SUPABASE_URL, config.SUPABASE_SERVICE_ROLE);
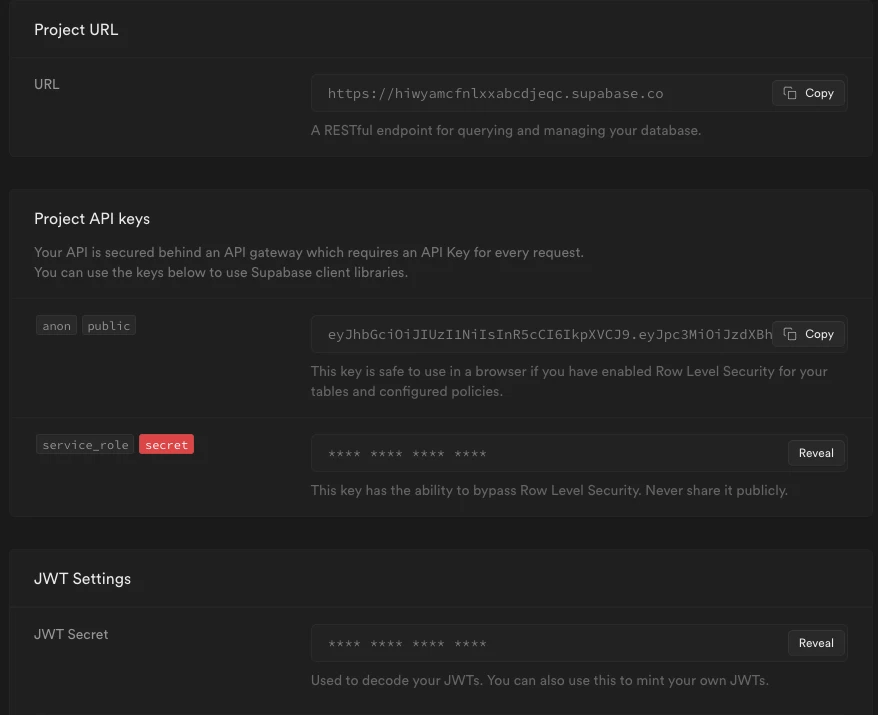
Now, we can get SUPABASE_URL and SUPABASE_SERVICE_ROLE from the Supabase dashboard. Go to Settings > API and copy the values.
Note that SUPABASE_SERVICE_ROLE is the service role that has the ability to bypass the RLS. Never share it publicly or use it on the client side.

The Moralis SDK must also be initialized:
import Moralis from 'moralis';

Moralis.start({
  apiKey: 'your_api_key_here',
});
Request a Message from Moralis' Auth API
Now we can create a function requesting a message from the Moralis Auth API. This function allows us to create a message that we will send to a user prompting them to sign it using a wallet:
export async function requestMessage({ address, chain, network }: { address: string; chain: string; network: 'evm' }) {
  const result = await Moralis.Auth.requestMessage({
    address,
    chain,
    network,
    domain: 'defi.finance',
    statement: 'Please sign this message to confirm your identity.',
    uri: 'https://defi.finance',
    expirationTime: '2023-01-01T00:00:00.000Z',
    timeout: 15,
  });

  const { message } = result.toJSON();

  return message;
}
Store a User in Supabase and Sign a JWT with the User
Now we need to build a function that validates a user-signed message. The function issues a JWT token if the signed message is valid. We can send this token to the frontend application. Of course, a token can only be issued to a current user. So, we create a new account if the user is not already there.
We will need to grab SUPABASE_JWT from Settings > API because we are going to use it to sign the JWT.
The example snippet assumes we use the jsonwebtoken package (imported as jwt).
Learn more about Supabase JWT.
export async function verifyMessage({ network, signature, message }: VerifyMessage) {
  const result = await Moralis.Auth.verify({
    network,
    signature,
    message,
  });

  const authData = result.toJSON();

  let { data: user } = await supabase.from('users').select('*').eq('moralis_provider_id', authData.profileId).single();

  if (!user) {
    const response = await supabase
      .from('users')
      .insert({ moralis_provider_id: authData.profileId, metadata: authData })
      .single();
    user = response.data;
  }

  const token = jwt.sign(
    {
      ...user,
      aud: 'authenticated',
      role: 'authenticated',
      exp: Math.floor(Date.now() / 1000) + 60 * 60 * 24 * 7,
    },
    config.SUPABASE_JWT,
  );

  return { user, token };
}
Make Client-Side Requests Using the JWT
Now, let's make the client-side that implements the authentication process.
We need to add the following dependencies using the CDN:
- Ether.js - so we can sign messages with our wallet (MetaMask in the case of this demo)
- The Supabase SDK
- Axios (for making HTTP requests)
<script src="https://cdn.jsdelivr.net/npm/axios/dist/axios.min.js"></script>
<script src="https://cdn.ethers.io/lib/ethers-5.2.umd.min.js" type="application/javascript"></script>
<script src="https://unpkg.com/@supabase/supabase-js"></script>
We can initialize an Anon Supabase SDK with the Supabase credentials directly:
const _supabaseAnon = supabase.createClient(SUPABASE_URL, SUPABASE_PUBLIC_ANON_KEY);
Notice how we used SUPABASE_PUBLIC_ANON_KEY instead of SUPABASE_SERVICE_ROLE because we don't want to bypass RLS this time.
Those values can also be found on Supabase dashboard. Go to Settings > API and copy them here on the client code.
Remember that previously we created a policy that allows only authenticated users to access the users table. So, using this Supabase client will not be able to fetch those results but it is useful to test the access policy. Later we will initialize an authenticated one.
We now want some code that retrieves the basic data about a user's wallet. The code below only works with the MetaMask provider.
const connectToMetamask = async () => {
  const provider = new ethers.providers.Web3Provider(window.ethereum, 'any');

  const [accounts, chainId] = await Promise.all([
    provider.send('eth_requestAccounts', []),
    provider.send('eth_chainId', []),
  ]);

  const signer = provider.getSigner();
  return { signer, chain: chainId, account: accounts[0] };
};
Ok, now we have everything to authenticate a user. The authentication flow sequence is pretty simple:
- Read basic information about a user's wallet.
- Generate a message by the backend function to get it signed by the user.
- Sign the message by the user's wallet.
- Send the signed message to the backend function and receive a token.
- With this token, we can initialize the Supabase SDK and make requests to the database. The initialization is almost the same as before, we just need to add the token to our Supabase client so it is identified as the user.
The example code of the authentication flow is available below:
const handleAuth = async () => {
  // Connect to Metamask
  const { signer, chain, account } = await connectToMetamask();

  if (!account) {
    throw new Error('No account found');
  }
  if (!chain) {
    throw new Error('No chain found');
  }

  const { message } = await requestMessage(account, chain);

  const signature = await signer.signMessage(message);

  const { user } = await verifyMessage(message, signature);

  _supabaseAuthenticated = supabase.createClient(SUPABASE_URL, SUPABASE_PUBLIC_ANON_KEY, {
    global: {
      headers: {
        Authorization: `Bearer ${user.token}`,
      },
    },
  });

  renderUser(user);
};
Now we can use this Supabase client to access our users' table using the token returned after verification:
const getUser = async (token) => {
  const { data } = await _supabaseAuthenticated.from('users').select('*');
  renderUser(data);
};
The complete code of the authentication flow is available on GitHub.